How To Make A Soap At Home
-melissa-jeanty-Ks4RTBgQ_64-unsplash")
My journey into homemade soap making began with my passion for crafting items at home. I focused on creating Tangie to help those suffering from skin irritations. Once I learned that petrochemicals hurt both our skin and the environment, I became determined to find a solution that aligns with my values and benefits everyone.
Although it required a significant time investment, I discovered that completing projects by myself was incredibly fulfilling. This process deepened my appreciation for the products I received and heightened my awareness of the quality of ingredients, positively focusing entirely on chemical-free & zero waste.
In this article, we will run through the process of making homemade soaps, but we will also go in-depth about the soap-making supplies and the ingredients a traditional soap bar has that we must avoid at all costs.
Table of contents
When Was Soap Invented And By Whom?
No single person “invented” soap. Instead, it was a multi-millennial accidental discovery that evolved from a laundry detergent into a personal hygiene staple.
The first concrete evidence of soap-making comes from clay cylinders found in ancient Babylon. These cylinders were inscribed with a simple recipe: fats boiled with ashes.
2800 BCE (Babylon): The earliest recorded formula in the history of soap making. Excavated clay cylinders contained a mixture of fats boiled with wood ash, used primarily to clean wool and textiles.
Ancient Rome (The “Sapo” Myth): Legend says animal fat from sacrifices on Mount Sapo mixed with wood ash and washed into the Tiber River, creating a natural cleaning clay. This gave us the term saponification.
7th Century (The Middle East): Arab soap-makers revolutionized the process by using vegetable oils (olive and laurel) and aromatic herbs, creating the precursor to modern bar soap.
12th–17th Century (Europe): Soap became a luxury item. Centers like Castile (Spain) and Marseille (France) became famous for high-quality, oil-based soaps.
How To Understand The Chemistry Behind Soaps
Soaps are a fascinating product of chemistry, primarily composed of molecules that are both hydrophilic (water-attracting) and hydrophobic (water-repelling). These dual properties allow soaps to effectively remove dirt, grease, and oils from surfaces.
What Is Saponfication?
The process of soap making begins with a chemical process known as saponification, a chemical reaction in which fats or oils are treated with a strong alkali, such as sodium hydroxide or potassium hydroxide. This reaction breaks down the triglycerides in fats into glycerol and fatty acid salts, which are the actual soap molecules.
Soap happens through a chemical reaction:
saponification
Triglyceride (Fat/Oil) + Alkali (Lye) –> Glycerol + Soap
In addition to their cleaning properties, soaps can also be enhanced with additives like fragrances, moisturizers, and antibacterial agents to improve their functionality and appeal.
Understanding the chemistry behind soaps not only highlights their practicality but also showcases the ingenuity of chemical science in everyday life.

Soap Molecule – How Do Soaps Work?
Soap Molecule Structure
A single soap molecule looks like a tiny balloon with a long string:
The Head (Hydrophilic): This is the “water-loving” end. It is polar and carries a negative charge, allowing it to bond easily with water molecules.
The Tail (Hydrophobic): This is the “water-fearing” end. It is a long chain of hydrocarbons that hates water but loves lipids (fats, oils, and grease).
How It Cleans: The Micelle
When you mix soap with water and scrub your hands, the molecules organize themselves into tiny spheres called micelles.
Seeking Oil: The hydrophobic tails flee the water and bury themselves in the droplets of oil or grease on your skin.
Surrounding the Enemy: The hydrophilic heads remain on the outside, facing the water.
Lifting and Rinsing: This traps the oil inside a “molecular cage.” When you rinse with water, the heads (which are bonded to the water) pull the entire cage and the trapped grease down the drain.
Soap vs. Viruses
This structure is also why soap is so effective against viruses like COVID-19 or the flu. Many viruses are encased in a lipid bilayer (a fatty “skin”). The hydrophobic tails of the soap wedge themselves into this fatty layer and pry it apart, effectively dematerializing the virus.
How Does Soap Remove an Oil Spot?
Oil and water naturally repel each other. When you add soap, the hydrophobic tails of the soap molecules desperately try to get away from the water. They find “sanctuary” by diving headfirst into the oil spot.
As more soap molecules crowd around the oil, they form a tiny sphere called a micelle.
The heads stay on the outside, facing the water. This effectively “shrink-wraps” the oil spot at a molecular level, lifting it off the fabric or skin.
The tails stay buried in the oil.
Warm water lowers the surface tension of the water and softens the oil (lipids), making it easier for the soap tails to penetrate the spot and break it up.
| Do Homemade Soaps Expire? Homemade soaps, like any other skincare product, have a shelf life. While they don’t “expire” in the traditional sense of becoming harmful, their quality and effectiveness can diminish over time. Factors such as the type of ingredients used, storage conditions, and the presence of preservatives play a significant role in determining how long homemade soap remains usable. Natural oils and fats in soaps can go rancid after a certain period, often resulting in an unpleasant odor or texture changes. Essential oils used for fragrance may also fade over time. Generally, homemade soaps last between 6 months to 2 years if stored properly in a cool, dry place away from direct sunlight. Adding natural antioxidants like vitamin E can help extend their shelf life. |
What Is Soap Made Of?
Homemade soap, when it has undergone an adequate curing process, tends to be gentler on the skin and more moisturizing compared to a large number of commercially available soaps.
Many commercial soaps are formulated with synthetic detergents that can strip the skin of its natural oils, leading to dryness and irritation. In contrast, homemade soap is typically made with natural ingredients, such as oils, butters, and lye, which can provide nourishing benefits.
The curing process is an important step, as it enables the soap to solidify and allows the chemical reactions to fully conclude. This ensures a product that is gentler on the skin and enhanced with moisturizing qualities. Depending on the recipe, this process may require a few weeks to several months, ultimately contributing to a softer and more skin-friendly outcome.
| Yes, you can legally sell your handmade products in the USA without forming an LLC. Many small businesses operate as sole proprietorships, which is a straightforward way to start selling. However, doing so means you are personally liable for any business debts or legal issues. If you want to protect your personal assets, consider forming an LLC in the future. Regardless of your business structure, ensure you comply with local regulations, obtain any necessary permits, and follow safety and labeling requirements for your products. |
Soap Making Ingredients
| Ingredient | Purpose | Where to Buy |
|---|---|---|
| Lye (Sodium Hydroxide) | Essential for saponification. | See section 2 below |
| Distilled Water | Prevents impurities; don’t use tap water. | Grocery stores |
| Base Oils | Common ones: Olive oil, Coconut oil, Palm oil, Castor oil. | Grocery stores, Bulk food stores, Soap supply websites |
| Essential Oils/Fragrances | Adds scent & fragrance | Health stores, Soap supply websites, Amazon |
| Colorants (optional) | Mica powders, natural clays, or herbal powders. | Soap supply stores, Etsy, Amazon |
| Additives (optional) | Oats, agave, dried herbs, etc. | Grocery stores or online |
How To Make Soap At Home
Making soap at home can be a fun and creative activity.
Here’s a simple guide to making basic soap using the cold process method:
Materials Needed
| Lye (sodium hydroxide) – Handle with care |
| Distilled water |
| Oils or fats – Common choices include olive oil, coconut oil or shea butter. |
| Essential oils (optional) – For fragrance. |
| Colorants (optional) – Natural or cosmetic-grade |
| Add-ins (optional) – Such as dried herbs, oatmeal, or exfoliants. |
| Protective gear – Gloves, goggles, and long sleeves |
| Digital scale – For accurate measurements |
| Stick blender – To mix the soap batter |
| Heatproof containers – For mixing lye and oils |
Instructions For Soap Making
Step 1: Prepare Your Workspace & Measure The Ingredients
- Work in a well-ventilated area.
- Wear protective gear to avoid contact with lye.
- Use a digital scale to measure the lye, water, and oils accurately.
- Follow a trusted recipe to ensure the correct proportions.
Step 2: Mix Lye Solution
- Slowly add lye to distilled water (never the other way around) and stir until dissolved. This will create heat and fumes, so be cautious.
- Set the lye solution aside to cool.
Step 3: Heat Oils
Melt your oils or fats in a heatproof container until they are fully combined.
Step 4: Combine Lye and Oils
- Once both the lye solution and oils are at a similar temperature (around 100–120°F or as specified in your recipe), slowly pour the lye solution into the oils.
- Use a stick blender to mix until the mixture reaches “trace” (a pudding-like consistency).
Step 5: Add Fragrance or Color (Optional)
Stir in essential oils, colorants, or any other add-ins. When making homemade soap, selecting the right fragrances can elevate your creation and make it truly special. Some of the best essential oil blends you must consider –
Lavender: Known for its calming and soothing properties, lavender essential oil not only adds a pleasant floral scent but also has skin-soothing benefits.
Eucalyptus: This refreshing, invigorating scent can create a spa-like experience in your soap. Eucalyptus essential oil is also known for its antiseptic properties.
Peppermint: A popular choice for its crisp and invigorating aroma, peppermint essential oil can provide an energizing effect and skin-cooling sensation.
Citrus Blends: Fragrances like lemon, orange, and grapefruit bring a bright and cheerful scent to your soap. They are also excellent for their antibacterial properties.
Rose: The delicate and romantic scent of rose essential oil can create luxurious, feminine soaps and is well-known for its moisturizing benefits.
Vanilla: This warm, sweet scent adds a cozy feel to your soap and blends well with other fragrances, making it a versatile choice.
Tea Tree: With its medicinal scent, tea tree oil is praised for its antibacterial and antifungal properties, making it a perfect addition for acne-prone skin.
Sandalwood: For a more earthy and grounding aroma, sandalwood is beautifully rich and can provide notes of warmth and resilience.
Jasmine: The exotic, sweet fragrance of jasmine can evoke romantic feelings and is often used for its soothing properties.
Bergamot: The refreshing citrus scent of bergamot has mood-lifting effects and combines well with other floral and herbal fragrances.
When selecting fragrances, consider whether you prefer essential oils, which are derived from natural plant sources, or fragrance oils, which can offer a wider variety of scents. Remember to test the fragrance in small batches, as some scents may behave differently once saponification occurs.
Step 6: Pour into The Mold
Pour the soap batter into your mold and smooth the top.
Step 7: Let It Set
Cover the mold with a towel or lid and let it sit for 24–48 hours to harden.
Step 8: Unmold and Cut
Once hardened, remove the soap from the mold and cut it into bars.
Step 9: Cure the Soap
Place the freshly made soap bars on a drying rack, ensuring that they are evenly spaced apart to allow for optimal air circulation. This step is crucial as it helps in the curing process, which typically takes about 4 to 6 weeks.
During this time, the soap undergoes a natural evaporation process that eliminates excess moisture content.
Curing is essential for several reasons: first, it helps in hardening the soap by allowing the water to evaporate, resulting in a longer-lasting bar. Second, it enhances the soap’s overall texture, making it smoother and more pleasant to use.
Most importantly, ensuring that the soap has fully cured makes it gentler on the skin. Soap that hasn’t cured properly may retain too much moisture, leading to a softer texture that can dissolve quickly and may not provide the desired cleansing properties.
By allowing your soap to cure for the recommended duration, you are guaranteed a high-quality product that is not only effective but also provides a delightful experience when used on the skin. After the curing period, the soap bars can be wrapped or stored properly for future use, maintaining their quality and benefits.
This recipe serves as just one example amidst the vast array of potential combinations and ratios of fats, lye, and various other ingredients that can be creatively blended to produce homemade soap.
Free Soap & Lye Calculator
Free Soap Formulator
Solid Bar (NaOH) or Liquid Soap (KOH)
Oil Inventory (Weight in Grams)
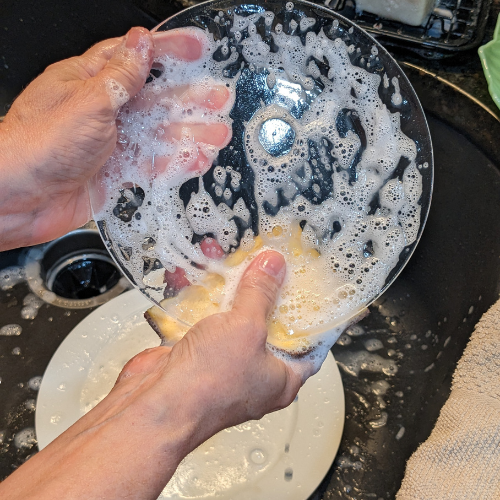
Step-by-Step Ways To Make A Dish Soap At Home
This recipe is formulated to create a hard, cleansing soap that effectively cuts grease. Using high coconut oil content in your cleaning products is essential for achieving maximum cleaning effectiveness.
Coconut oil is known for its natural antibacterial properties, making it an excellent ingredient for various cleaning applications. It can help break down dirt, grime, and grease, leading to a more thorough clean.
When selecting products, look for those that contain a higher percentage of coconut oil, which can enhance the cleaning process. This is particularly beneficial for kitchen and bathroom surfaces that are prone to bacteria and buildup. Additionally, coconut oil is a natural moisturizer, meaning it can leave surfaces smooth and shiny without harsh chemicals.
| Soap Ingredients | Amount | Purpose |
|---|---|---|
| Coconut Oil | 500g | High cleansing creates a hard bar |
| Castor Oil | 50g | Boosts lather |
| Sodium Hydroxide (Lye) | 94g | Reacts with oils to form soap |
| Distilled Water | 190g | Dissolves the lye |
| Lemon or Lime Essential Oil (optional) | 15–20g | Adds fresh, degreasing scent |
| Lemon Zest or Citric Acid (optional) | 1–2 tsp | Mild natural degreaser |
Superfat: 0–1% (low superfat ensures it rinses clean without residue)
Instructions
Step 1: Prepare Workspace
- Wear gloves and goggles
- Work in a well-ventilated area
- Prepare your soap mold
- Step 2: Mix the Lye
- Slowly add lye to distilled water (never the other way around)
- Stir until dissolved; allow to cool to ~100°F (38°C)
Step 3: Melt the Oils
- Gently melt the coconut oil and add the castor oil
- Let the oil mixture cool to ~100°F
Step 4: Combine Lye and Oils
- Pour the lye solution into the oils
- Blend with a stick blender until medium trace (pudding texture)
Step 5: Add Essential Oils or Extras
- Add lemon EO, zest, or citric acid (optional)
- Stir thoroughly
Step 6: Pour into the Mold
- Pour batter into your mold
- Tap gently to release bubbles
Step 7: Insulate and Set
- Cover and insulate for 24–48 hours
- Unmold and cut if needed
Step 8: Cure the Soap
- Cure for 4–6 weeks in a cool, dry place
- Turn bars weekly
Homemade Soap Making Tips From Tangie
Many individuals hesitate to make soap due to the need to handle lye. I can relate to this feeling, as I initially felt the same! At first, I had my husband take care of that part until I became more comfortable with the process.
While lye should be handled with care, it’s important to use the same common sense as you would in any potentially hazardous situation, such as cooking on a hot stove or using a strong household cleaner like bleach. Always wear appropriate protective gloves and eyewear when working with lye, and treat it with the respect it deserves.
Do NOT allow children to participate in this activity, and ensure that pets are kept out of your workspace.
Always add lye to water and other liquids, not the other way around. You can remember this by imagining snow (the lye) falling onto a lake (the water). The lye solution heats up quickly and produces strong fumes for a brief period, so avoid inhaling them.
The best workspace is your kitchen sink, ideally near an open window. If lye comes into contact with your skin, rinse it off thoroughly with plenty of cool water. Using an accurate digital scale is crucial! Avoid measuring soap-making ingredients by volume (like cups or tablespoons) as it isn’t sufficiently precise.
The process of soap making is not only a craft but also a delightful adventure, offering endless opportunities to experiment with different formulations. Each unique recipe can yield surprisingly diverse results, making it an engaging exploration for those who enjoy hands-on activities and DIY projects.
Among the many combinations I’ve tried, some truly stand out. For instance, the blend of bright orange and the warm, earthy scent of sandalwood creates an invigorating aroma, enhanced by the added texture of poppy seeds, which also contributes an appealing visual aspect to the final product.
Similarly, the soothing floral notes of lavender paired with the herbaceous scent of clary sage manifest a calming experience, especially when complemented by the delicate, fragrant dried lavender blossoms.
Each of these combinations not only serves practical purposes but also elevates the soap-making process into a creative and enjoyable art form.
Frequently Asked Questions
Yes, you can legally sell homemade soap in the USA, but you must comply with several regulations.
Ensure your products are labeled with a complete ingredients list, product name, and your contact information. Follow Good Manufacturing Practices (GMP) for safety, and consider testing your products for irritants.
Check local health department requirements for any necessary permits or licenses, and be aware of sales tax obligations. Additionally, consider obtaining liability insurance to protect against potential claims. Regulations may vary by state, so it’s essential to research specific laws in your area before starting your soap business.
In general, you do not need FDA approval to sell soap in the USA, as long as it is considered a cosmetic or a personal care product and not intended to treat or prevent diseases.
However, if your soap makes therapeutic claims or is marketed as a drug, it may require FDA approval. It’s crucial to comply with labeling regulations, ensuring that ingredients are listed accurately and that claims are truthful. Additionally, follow Good Manufacturing Practices (GMP) to ensure product safety. Always check state and local regulations, as they may have specific requirements for selling homemade soap.